Page 47 of 58 FirstFirst ... 37454647484957 ... LastLast
Results 461 to 470 of 580

Thread: NSX Health Check Service

  1. #461
    Join Date
    Sep 2008
    Location
    Bucks, UK
    Posts
    2,320
    Blog Entries
    2704

    Default

    Click image for larger version. 

Name:	Type2Coolant.JPG 
Views:	4412 
Size:	166.1 KB 
ID:	7746 Click image for larger version. 

Name:	AlwaysChangingTheLabel.JPG 
Views:	4395 
Size:	130.1 KB 
ID:	7743 Click image for larger version. 

Name:	VacuumFeed.JPG 
Views:	4391 
Size:	164.7 KB 
ID:	7747
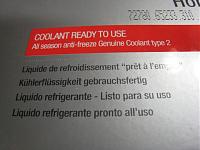
    Honda Type 2 Coolant.
    For some reason, they keep changing the label…
    Vacuum feed and start the engine for a short period to initially adjust the coolant level before completely warming up the engine.

    Click image for larger version. 

Name:	INJdisabled.JPG 
Views:	4302 
Size:	223.5 KB 
ID:	7745 Click image for larger version. 

Name:	CompressionCheckAfterTBservice.JPG 
Views:	4393 
Size:	174.8 KB 
ID:	7744
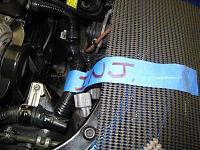
    Disable the INJ and set the throttle butterfly to WOT.
    Then, time for the compression check after the TB service.

    I always spend many hours adjusting the valve clearance. May be I’m aiming too much of the perfection of detail but it always paid off at the end.

    The compression between each cyl is much closer than the data measured before starting the service.

    Before: #1:**9, #2:**8, #3:**1, #4:**4, #5:**6, #6:**8
    After : #1:**2, #2:**1, #3:**1, #4:**1, #5:**0, #6:**1


    Wait for the engine to cool down before adjusting the coolant level again and time for the test driving session.

    More to follow.

  2. #462
    Join Date
    Sep 2008
    Location
    Bucks, UK
    Posts
    2,320
    Blog Entries
    2704

    Default

    Click image for larger version. 

Name:	InstallIGNcoil.JPG 
Views:	3929 
Size:	176.5 KB 
ID:	7748 Click image for larger version. 

Name:	Collar.JPG 
Views:	3938 
Size:	159.9 KB 
ID:	7749
    Installing the IGN coil.
    The most important collar before placing the IGN Coil cover.

    Click image for larger version. 

Name:	FrontBankComplete.JPG 
Views:	3907 
Size:	190.3 KB 
ID:	7750 Click image for larger version. 

Name:	RearBankComplete.JPG 
Views:	3896 
Size:	193.3 KB 
ID:	7751 Click image for larger version. 

Name:	EngBayComplete01.JPG 
Views:	3938 
Size:	162.8 KB 
ID:	7752
    Front and Rear Bank completed.
    Engine bay finished.

  3. #463
    Join Date
    Sep 2008
    Location
    Bucks, UK
    Posts
    2,320
    Blog Entries
    2704

    Default

    For TB service, it is not required to change the Eng Oil. However, for this NSX, it was decided to replace it at the same time. There was about 0.8L of excess oil inside the engine. For some reason, this is getting quite common for UK NSX. Also, I seem to encounter over torqued oil filter regularly these days. Oil level adjusted properly.

    Click image for larger version. 

Name:	OilPanGasket.JPG 
Views:	3865 
Size:	162.6 KB 
ID:	7753
    I wanted to monitor the condition of oil leakage as we replaced complete gasket kit during the TB service.
    However, just looking at the state of Oil pan and pan gasket, it would be best to replace both of them in the future.
    As mentioned previously, way too much torque was used in the past with strange looking trace of sealant at the oil pan. The gasket was over torqued so much that it was sticking out of its place and touching the oil filter. Best to get hold of spare front O2 sensor and take out the front down pipe/header to remove the oil pan.

    Click image for larger version. 

Name:	LensCover.JPG 
Views:	3871 
Size:	171.1 KB 
ID:	7754
    The owner wanted to have his broken door light lens/cover repaired. The two of the locking tabs were broken and only one of them were recovered. Used the special plastic repair kit for the task.
    I could have created the missing tab using the special moulding method but it would be cheaper to buy new one so decided to use this repaired one in the boot and use the original boot one into the door panel.

    Test driven the car, placed it on the lift over night, adjusted the final coolant level, checked for any leakage and final check for completion of TB service.

    More to follow.

  4. #464

    Default

    Hi Kaz is it the case that JDM cars have a clear cover for the doors and UK cars have a Red one?

    Cheers,

    AR

  5. #465
    Sudesh Guest

    Default

    Quote Originally Posted by AR View Post
    Hi Kaz is it the case that JDM cars have a clear cover for the doors and UK cars have a Red one?

    Cheers,

    AR
    Yeah, JDM cars have clear door lights Ary!

  6. #466
    Join Date
    Sep 2008
    Location
    Bucks, UK
    Posts
    2,320
    Blog Entries
    2704

    Default

    As this NSX has aftermarket suspension sets and larger wheel size, I used my own alignment setup last year. Based on this and recent temperature drop, I have set the tyre pressure at 31psi Front and 37psi Rear this time.

    Normally, I will be using 30/36psi combination for this NSX.


    Click image for larger version. 

Name:	OldBulbs.JPG 
Views:	3848 
Size:	140.4 KB 
ID:	7755 Click image for larger version. 

Name:	New Bulbs.JPG 
Views:	3877 
Size:	206.8 KB 
ID:	7756
    The owner wanted me to investigate the brightness difference between the Right and Left tail lights.
    This NSX is JDM so it uses different light setup and wattage.

    After removing the bulbs, it was quite clear that the small 5W ones were both nearly at the end of their life and changed into silver/black shade inside the bulb glass.
    One of the twin filaments bulb was using different wattage (28/5W) and also most of them were starting to show some black shade. After talking to the owner, it was decided to replace all bulbs.

    JDM uses 27/5W for the tail brake/small lights whereas UK one uses 21/5W.

    I was little concerned about using smaller wattage because of the feature of brake light failure sensors. However, as the face-lifted UK NSX is using exactly the same failure sensors as JDM one even for the 21/5W setup, I decided to go ahead and replaced all of the bulbs to the ones available in UK.
    No issues so far.
    New ones installed and checked.


    Click image for larger version. 

Name:	Speaker.JPG 
Views:	3842 
Size:	157.6 KB 
ID:	7757
    The owner was experiencing squeaking noise from one of the speakers recently.
    I refurbished the Bose Amplifiers last year so I offered the owner for free of charge replacement AMP if it was faulty.
    However, initially, I couldn’t re-create the same issue on the car nor on the bench.

    In order to save some time, I decided to install another spare AMP inside the Bose speaker box.

    Finally, after 5Hrs of testing, it started to make some annoying noise from Right Door speaker even with the replacement AMP.

    It was like someone using sandpaper back and forth on the plastic panel.


    The noise was only from the right door speaker and it didn’t change the level even when the volume level was turned all the way down to zero.


    The noise didn’t change by altering the input such as FM/AM/CD sequences.

    The audio balance setup didn’t change the noise level.

    Click image for larger version. 

Name:	AmpSpeakerTest02.JPG 
Views:	3906 
Size:	230.3 KB 
ID:	7758
    In order to be 100% sure that it is not the AMP or Speaker issues, I decided to run my bench system with spare AMP and another Speaker unit connected to the actual door speaker connector.
    As soon as it started to make the noise, I placed the original Bose speaker box from the right door and managed to re-create the same noise as the bench system one.

    It confirmed that the noise was coming from either the headunit itself or from the wiring before entering the speaker box.
    Last edited by Kaz-kzukNA1; 15-10-2010 at 09:14 PM.

  7. #467
    Join Date
    Sep 2008
    Location
    Bucks, UK
    Posts
    2,320
    Blog Entries
    2704

    Default

    Click image for larger version. 

Name:	AudioHU01.JPG 
Views:	3880 
Size:	195.2 KB 
ID:	7759 Click image for larger version. 

Name:	AudioHU02.JPG 
Views:	3902 
Size:	200.5 KB 
ID:	7760
    Click image for larger version. 

Name:	AudioHU03.JPG 
Views:	3844 
Size:	191.0 KB 
ID:	7761 Click image for larger version. 

Name:	Repair01.JPG 
Views:	3900 
Size:	196.5 KB 
ID:	7762
    Based on the recent experience with another headunit, it may worth trying the similar service in the near future. It lost the power completely due to capacitor leakage and I also replaced several capacitors in order to remove the noise.


    This NSX has been modified to have wider body work and during this process, the rod aerial was removed.

    JDM headunit uses diversity aerial system so it has another aerial in the engine hatch glass.

    However, there seems to be no frequency shifter/converter added to the FM input port on this NSX and thus, the owner couldn’t receive any radio stations.
    Therefore, at the time of headunit service, it is best to add the frequency converter and add another aerial to make the diversity system to work properly.


    Click image for larger version. 

Name:	PrepInstallationIpod.JPG 
Views:	3890 
Size:	195.8 KB 
ID:	7763
    Although it looks like we may have headunit issue, in order to install the iPod adaptor USA Spec PA-11 HON, I started to disassemble the interior panels.
    Hope I can receive the parts from US very soon as it forced me to change some of the future service schedule for other owners.


    Just need to check the state of DIY A/C filter that I installed last year, carry out the annual A/C blower motor fan and Evapo cleaning process plus annual Health Check Service and ready to return the car to the owner.

    More to follow.

    Kaz

  8. #468
    Join Date
    Sep 2008
    Location
    Bucks, UK
    Posts
    2,320
    Blog Entries
    2704

    Default

    Just about a year ago, I found lots of dirty/sticky debris on the A/C evaporator on this specific NSX and after cleaning it, I installed DIY made filter at the top of blower motor fan entrance.

    Click image for larger version. 

Name:	DIYfilterAfter1year.JPG 
Views:	3868 
Size:	188.3 KB 
ID:	7764 Click image for larger version. 

Name:	StillLookedClean.JPG 
Views:	4032 
Size:	206.1 KB 
ID:	7765
    After one year, looking at the debris trapped by the filter, it did great job in keeping the evaporator clean and resulting in not breathing these things while you are driving. Also, it will prevent the dust from sticking onto the cabin temperature sensor that may start making noise if it gets too dirty.


    Initially, I didn’t understand the reason why the A/C smelled so bad even with fairly clean A/C evaporator fins.

    Click image for larger version. 

Name:	OilLeak01.JPG 
Views:	3871 
Size:	112.7 KB 
ID:	7766 Click image for larger version. 

Name:	OilLeak02.JPG 
Views:	3850 
Size:	115.0 KB 
ID:	7767
    However, after applying the UV ray inspection light, I found the cause of the issue.

    It is very sad but unfortunately, it looks like the evaporator itself is leaking the A/C gas and oil.
    A/C compressor oil attracts moisture and it is very sticky. Once it started leaking, it is quite nice place for the germs to breed resulting in bad smell.

  9. #469
    Join Date
    Sep 2008
    Location
    Bucks, UK
    Posts
    2,320
    Blog Entries
    2704

    Default

    Click image for larger version. 

Name:	OilLeak03.JPG 
Views:	3835 
Size:	133.8 KB 
ID:	7768 Click image for larger version. 

Name:	OilLeak04.JPG 
Views:	3884 
Size:	154.2 KB 
ID:	7769 Click image for larger version. 

Name:	OilLeak05.JPG 
Views:	3857 
Size:	105.1 KB 
ID:	7770
    I was hoping it was leaking from the expansion valve just in front of the evaporator but the more I looked at it, the more it looked to be the evaporator leakage.

    Unfortunately, OEM evapo is not cheap and on top of this, it will be a big task as both seats and the entire forward section interior panels (dash board, etc) have to come out before removing the evapo box.

    Click image for larger version. 

Name:	Washing.JPG 
Views:	3862 
Size:	200.5 KB 
ID:	7771
    For now, the best we can do is to wash down the leakage and kill the germ as much as possible until we replace the evapo unit.


    Loosing the A/C oil is not good for the compressor and eventually, it will start making grinding noise due to the lack of oil.

    Then, it will cost more to replace the compressor, cleaning the debris inside the system pipes, etc so sooner is better to address any A/C problems.


    Time for the annual Health Check service.

    It helps both the owner and myself a lot as we can build up detailed history of the specific NSX and monitor the changes over the years on certain areas.


    Finally, the iPod adaptor USA Spec PA-11 HON arrived at Heathrow airport.
    Now the waiting game starts with the UK Customs...

    I hope they will calculate the duty/tax quickly and release the package so that it can be delivered to my place.


    And when I just thought everything will be on schedule, my home boiler broke down. Hope it will be fixed very soon as I want to wash this NSX and use at least mild soft water at the final stage. I don't like using normal tap water as I live in very hard water area.


    Regards,
    Kaz

  10. #470
    goldnsx Guest

    Default

    Ough! Please do write-up when you take the dash out.

Page 47 of 58 FirstFirst ... 37454647484957 ... LastLast

Posting Permissions

  • You may not post new threads
  • You may not post replies
  • You may not post attachments
  • You may not edit your posts
  •