-
08-11-2010, 11:04 PM
#501

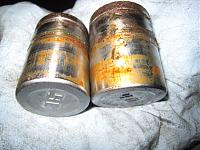
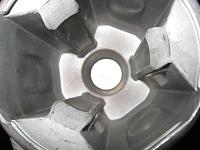
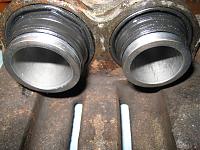
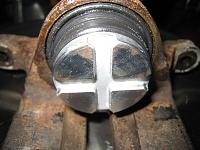
No wonder why the pistons were so heavy to move. Im afraid none of them were re-usable.
In fact, none of the pistons on all four corners were re-usable.
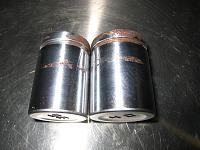
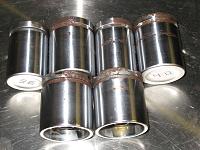
All six pistons are going to be replaced with the new ones.

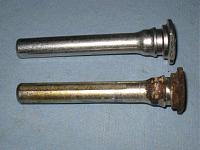
I dont think Ill be re-using these hoses
.
Challenge continues
Kaz
-
12-11-2010, 11:47 AM
#502
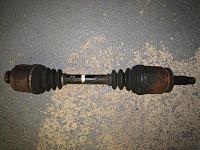
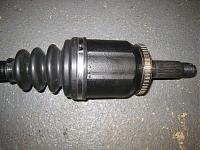
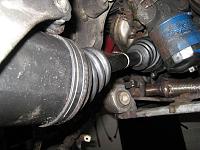
While cleaning the brake callipers, wanted to finish the re-built of RH drive shaft. The inboard joint side was already done while I was working on the previous NSX so needs to finish the outer one.
Cleaned the outboard joint and inspected the inner wall. You need to clean it to this level to inspect it thoroughly.
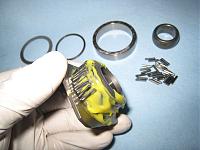
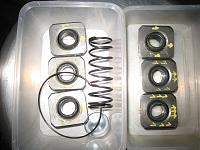
Planting the tiny pin bearings with new grease and filling the housing up with extra grease before closing it.
All six rollers are now ready for the re-built.
-
12-11-2010, 11:49 AM
#503
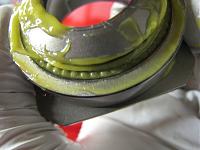
Finished the re-built.
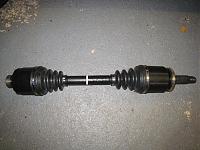

So, something looked like this is now replaced with this one.
-
12-11-2010, 11:53 AM
#504
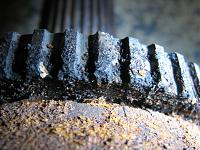
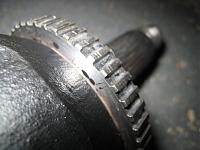
The trigger teeth looks completely different now.
Installed on the car.
Finished cleaning the brake calliper and in the process of refurbishment service.
Needs to push a lot as there are two NSXs waiting for the TB/WP services as well as full cooling system refresh. Some of the parts are already at my place
Doesnt help having two F1 Grand Prix events back to back
.
More to follow.
Kaz
-
16-11-2010, 11:33 AM
#505
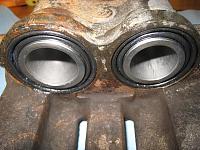
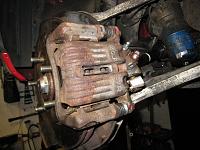
Brake system refurbishment.
While the outside of the calliper and bracket were very rusty, the internal wall was very clean.
Although we could have soda blasted to clean/remove the rust and powder/paint coated the calliper/bracket, we decided not to do so as we felt it would be better to invest into the future upgrade of the calliper to the later spec.
The surface of the calliper and bracket were cleaned as much as possible so that I can apply the specific material to the certain area. This will make big difference in preventing the rust from these areas until the next brake refresh service.
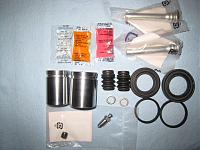
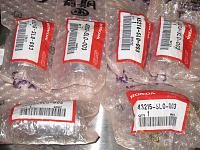
Some of the parts for the Front side service. Double checking the installation by operating the pistons. Both pistons should move smoothly with the fingers.
-
16-11-2010, 11:37 AM
#506
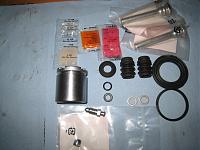
Moving onto the Rear side. Some of the parts used for the service plus the parking brake mechanism. There are other parts inside the rear piston for this mechanism and we are going to use new piston so they will be replaced as well.
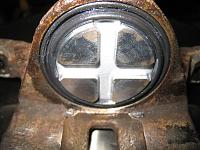
Again, after the installation of the piston, it will be double checked by operating it. Important to set the groove of the piston at the right angle. Sometimes, I found the rear inner brake pad not operating properly due to the wrong angle.
-
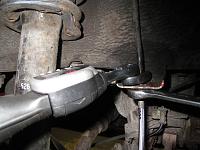
16-11-2010, 11:48 AM
#507
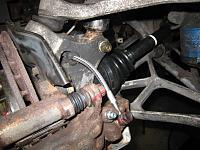
I dont think I can re-use this slider pin (the lower one in the photo) so replaced with the new one.
All four callipers have new bleeder screw now.
Didnt feel safe to re-use the old tired rubber brake hose so requested Goodridge to build specific length hose for us.
The length is good for both original and later calliper spec and already tested on my NSX for many years using both type of callipers.
So, when the owner is ready for the upgrade, he doesnt need to replace the brake hose again especially at the rear side.
Also, we decided not to replace the corroded brake pipes as we are going to replace them especially the Front ones during the ABS upgrade process in the near future.
It was very tricky to install the new hoses as the flair nut was completely seized to the pipe and thus, I had to rotate the hose side first, torque it to the spec without causing any kink when connecting to the calliper.
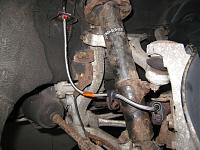
Still needs to finish the installation of the rear right wheel speed sensor, refresh of brake master cyl, torque the suspension bolts/nuts under 1G, ABS flush, replace Main Relay, replace engine oil & filter and service the Bose AMPs.
Aiming to return this NSX to the owner very soon and start working on two more NSXs. Both will go through the TB/WP/Valve clearance + cooling system service.
Its going to be fun replacing more than 20 coolant hoses when it is cold
More to follow.
Kaz
-
17-11-2010, 10:29 PM
#508
Additional photos from rear calliper installation.
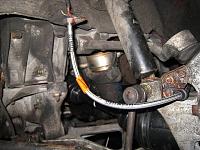
New rear brake hose installed.
Brake pipe and hose torqued to the spec using digital torque wrench.
-
17-11-2010, 10:33 PM
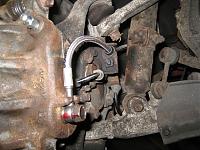
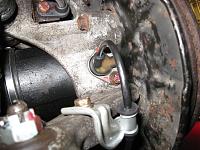
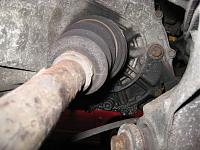
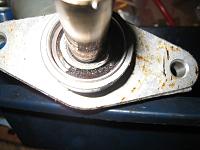
#509
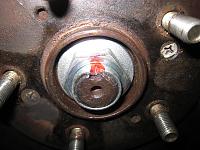
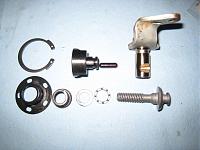
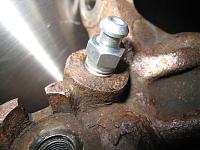
RH drive shaft spindle nut torqued to the spec.
New RR wheel speed sensor installed.
Honda discontinued this speed sensor for earlier models for RR side so you can only get hold of the later spec one.
You will need to modify the angle of one of the cable bracket before the installation.
When we are ready to work on the LH drive shaft, we will need to replace the trans case seal. Its already leaking and in fact, I replaced it for another owner several months ago.
Push, push. I must finish this NSX very soon....
Kaz
-
20-11-2010, 12:51 PM
#510
Overhaul (OH) of Brake Master Cyl.
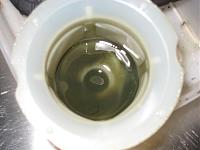
Lots of residue was trapped at the filter so looked like the master cyl was not serviced for many years.
In fact, at the base behind the master cyl, it was leaking but as the leaked brake fluid stripped the black paint off the brake booster surface, the debris was blocking the seeping hole and hiding the issue.
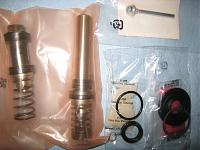
Master Cyl OH kit. Sometimes, it is quicker to replace the entire cyl as an assembly including the reservoir but this one was not too bad and saved the cost by overhauling it than replacing.
English manual states as do not try to disassemble the master cylinder assembly. Replace the master cylinder assembly with a new part if necessary and thus, no instruction on how to OH it.
In Japan, we used to be forced to OH it every 2 3 years by law so there is a specific manual in Japanese.
Once overhauled, we need to double check the pushrod clearance. Although it is very unusual to adjust it, I have no idea whether someone touched it in the past or not so always check it.
 Posting Permissions
- You may not post new threads
- You may not post replies
- You may not post attachments
- You may not edit your posts
-
Forum Rules


 Reply With Quote