-
26-12-2009, 06:07 PM
#141

2. ABS
With standard ABS service at the main dealer, they will only replace the brake fluid inside the ABS reservoir and thats it. This is better than doing nothing but it wont replace any fluid at the chamber around the four solenoids for each wheels.
It is recommended to bleed the ABS accumulator and flush the four solenoids at least once in two years time but ideally every year.
So, although ABS system on this NSX was serviced by the main dealer, it was still full of air with dirt inside.
I normally bleed the accumulator twice using fresh fluid. Then, for each solenoids, Ill activate it in a short burst using the full amount of fresh fluid stored inside the accumulator until there is no more pressure built inside there. Then, before moving onto the next solenoid, Ill drain out any fluid inside the ABS reservoir in order not to mix any debris from the solenoid and the old fluid. After all four solenoids were flushed, Ill further bleed the accumulator twice to complete the service.
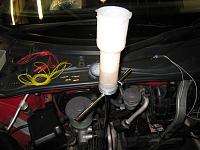
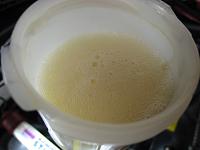
By this time, the fluid returned to the ABS SST T-wrench would be clear with no air inside the accumulator.
This NSX was very lucky that none of the solenoids were sticky.
Quite often, at least one of them was sticky and either not returning any fluid back to the reservoir or causing slow leak over many hours. There is a technique to cure this problem but in the worst case scenario, you will need to disassemble the ABS solenoid housing or upgrade to the later ABS spec.
Im hoping to carry out this upgrade on my NSX next year.
-
26-12-2009, 06:12 PM
#142
3. Main Relay
Another common failure parts on our NSX. This one is non-DBW model so it was easy to replace it.
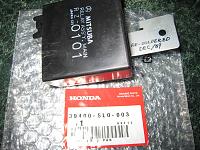
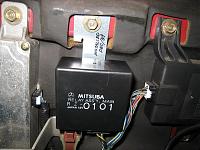
The original one was opened up and re-soldered so that it could be used as an emergency spare for other owners.
Looking at the date stamped on the actual internal relay, it was really old and still using the small spring which was from the old design. There was a tiny hairline crack at the solder joint so Im glad we replaced it now
.
4. Crank Pulley MT version
On this NSX, the timing belt was replaced in the past but not the Crank Pulley.
Considering the age of this NSX, we decided to replace the pulley as a preventative measure.
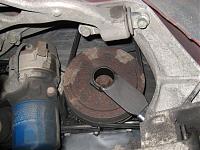
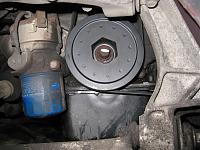
Although the pulley bolt was removed during the last timing belt service, it was not cleaned/greased properly so it took quite a lot of torque to loosen it but not too bad compared to other ones.
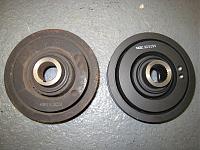
The original one looked really rusty and tired
.
The new one installed with the pulley bolt properly treated and torqued to the spec.
It will be fine for many years.
-
26-12-2009, 06:12 PM
#143
Thanks for the explanation on the stainless parts Kaz, thw cutting bolts and nuts bits makes a lot of sense.
-
26-12-2009, 06:16 PM
#144
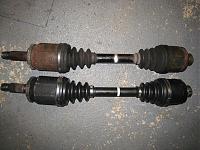
5. Driveshaft Right side
This is one of the weakest points on our NSX.
Almost all of the NSX will suffer from leaking joints on the driveshaft especially at the right side.
This one was the same and already making noticeable click when the wheel was turned by hand.
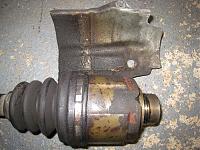
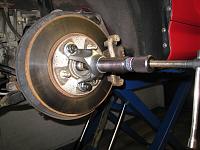
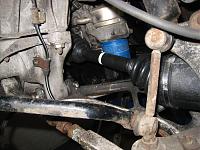
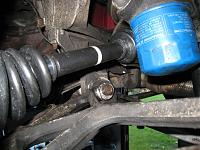
For most of the NSX, the joint can be separated from the hub/spline with reasonable amount of force. However, on this one, it looked as if it was never removed and heavily corroded that it just didnt want to come out.
In the end, I had to use the hydraulic hub puller with one big tap to crack open the corrosion. The inner joint was leaking and the outer one was making the click.
In order to speed up the process, I normally prepare the refurbished one ready for the replacement. During the refurbishment, each joint will be inspected in detail. Then, each roller will be disassembled, cleaned, then lots and lots of pin bearings are packed with new grease to reassemble the roller. With this process, it will provide you with completely different feeling when the joints were turned by hand.
The joints and the shaft were painted in black and using the new boots and grease, the length was set to the spec to adjust the amount of air inside the boot to complete the refurbishment.
Beautiful driveshaft in place.
-
26-12-2009, 06:20 PM
#145
6. Radiator drain bolt O-ring
I was talking with the owner on what happened on Eurostar with the thermal shock recently.
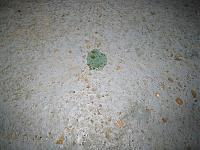
This morning, I noticed small amount of coolant on the garage floor.
Although the tiny amount of leakage from the drain bolt was spotted during the last Health Check Service, it looks like the recent severe cold weather and rise of temperature this morning speeded up the leakage.
Ill be replacing the two O-rings next week
Ill be servicing the front rackend/tierod area before going to the alignment place in the new year and at the same time, I'll be looking into the door window alignment if I have enough time.
Its going to be busy for next few weeks to carry out several Health Check for other owners while finishing this NSX
.
Regards,
Kaz
-
09-01-2010, 12:34 AM
#146

Thank Kaz for your help, i found lot of informations for my NSX.
-
10-01-2010, 10:49 PM
#147
Health Check
I visited Kaz on the 3rd January for a Health check on my newly acquired car.
I would echo the comments and sentiments of the forum, Kaz is an exceptionally talented guy with great knowledge of the car. His attention to detail and care taken with the car is second to none.
It was very cold but Kaz's warm hospitality more than made up for the cold weather.
I'm glad i made the visit, I learned a lot and now have a priority checklist of items in need of attention, that I can address over the coming months.
Henry
-
11-01-2010, 11:28 PM
#148
Thank you for the kind message, anachonda and Henry.
Looking forward to working on your NSX in the near future.
The NSX that I started to work on before Christmas is still with me as the road condition is not safe to drive with normal tyres.
As reported in the previous post, it was leaking small amount of coolant on my garage floor from the bottom radiator drain bolt.
However, after the car was left inside the garage for a longer period without any engine fire up, I started to notice very slow leakage (a few drips per day) from the top bleeding plug as well.
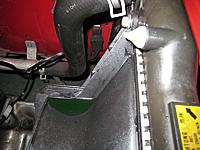
It won't start dripping on the floor until after many weeks as it will be first trapped in the pocket behind the radiator.
Time to replace O-ring at both drain/bleeding bolts.
As I had spare drain/bleeding bolts in stock, it was easy to replace the O-rings once I received them from Honda.
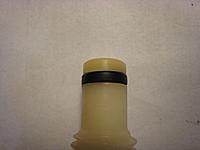
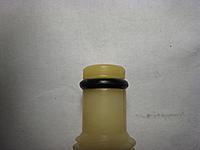
The old (Left) and new (Right) O-ring.
The old one was almost flat and not doing any job.
After replacing these O-rings, bled the system very carefully and went out for a test driving session to check the re-furbished driveshaft as well.
Since then, there was not a single drip so Im glad that we replaced them now.
Regards,
Kaz
-
11-01-2010, 11:39 PM
#149
While waiting for the snow to clear up so that I can take above NSX to the alignment place, I decided to work on my NSX.
I want to do so many things this year in order to create new packaged service menu for the NSX owners.
Having said this, I can spend only a few hours this time so decided to check my IGN Switch comp.
I already cleaned it several times in the past and the last one was done about 3 years ago.
For 15 years, Ive never experienced any issues such as sudden engine stop but since it is not an expensive part, it may be best to replace it after long years of usage.
As my NSX is an every day car, Ill be accessing the IGN switch many times per day so its a good endurance test.
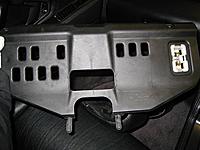
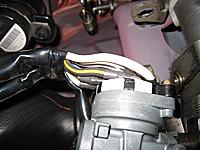
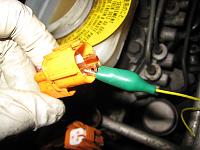
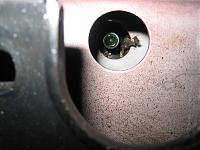
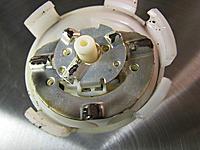
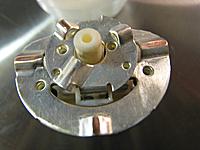
After removing the [Edit: deleted 'two'] lower panel, you will be able to access the two small bolts holding the IGN Switch comp. It is at the very back of the key cylinder and it has lots of thick wires soldered to it.
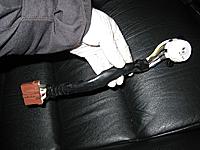
There is a brown connector at the other end. After removing the switch comp, the key cyl side will look like this. This will provide you with the original position of the contacts inside the white cover described in the next post.
Last edited by Kaz-kzukNA1; 12-01-2010 at 03:49 PM.
Reason: Just remove the single lower panel and not two.
-
11-01-2010, 11:54 PM
#150
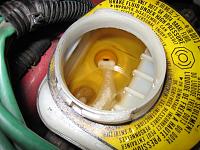
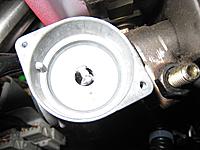
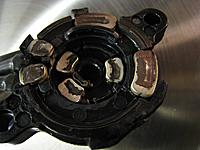
On the IGN switch comp, you can remove the white cover to expose the internal contact points. The cover will only fit in one orientation so no need to worry about its original position.
As expected, even after just 3 years, the contacts were already showing fretting corrosion residue.
Needs to clean them again.
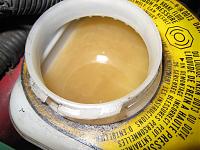
You can carefully take out the contacts assy inside the white cover but before doing so, please make a note on its original orientation as you want to put it back into the 'Lock' position.
I normally use super fine wet sanding paper with very little force to re-condition the contacts surface.
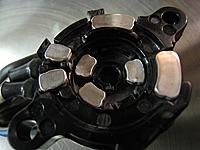
Before (Left) and After (Right) of each contacts assembly.
Re-assemble everything and test the key operation several times before going out for a test driving, if I can...
I still need to find some time to replace my fuel filter and install the Type-R Clutch pedal with damper-less setup.
I hope I can visit the alignment place this week...
Regards,
Kaz
 Posting Permissions
- You may not post new threads
- You may not post replies
- You may not post attachments
- You may not edit your posts
-
Forum Rules


 Reply With Quote