-

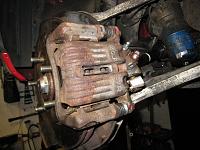
Additional photos from rear calliper installation.
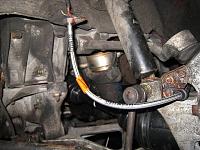
New rear brake hose installed.
Brake pipe and hose torqued to the spec using digital torque wrench.
-
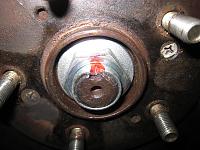
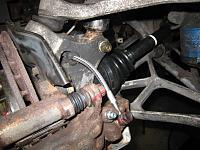
RH drive shaft spindle nut torqued to the spec.
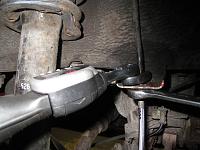
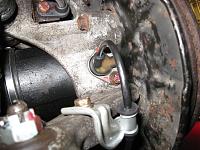
New RR wheel speed sensor installed.
Honda discontinued this speed sensor for earlier models for RR side so you can only get hold of the later spec one.
You will need to modify the angle of one of the cable bracket before the installation.
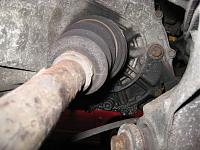
When we are ready to work on the LH drive shaft, we will need to replace the trans case seal. Its already leaking and in fact, I replaced it for another owner several months ago.
Push, push. I must finish this NSX very soon....
Kaz
-
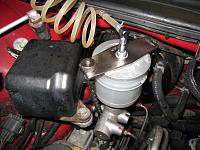
Overhaul (OH) of Brake Master Cyl.
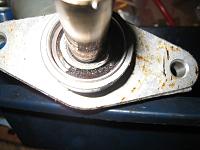
Lots of residue was trapped at the filter so looked like the master cyl was not serviced for many years.
In fact, at the base behind the master cyl, it was leaking but as the leaked brake fluid stripped the black paint off the brake booster surface, the debris was blocking the seeping hole and hiding the issue.
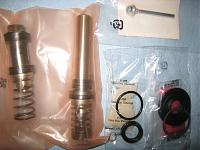
Master Cyl OH kit. Sometimes, it is quicker to replace the entire cyl as an assembly including the reservoir but this one was not too bad and saved the cost by overhauling it than replacing.
English manual states as do not try to disassemble the master cylinder assembly. Replace the master cylinder assembly with a new part if necessary and thus, no instruction on how to OH it.
In Japan, we used to be forced to OH it every 2 3 years by law so there is a specific manual in Japanese.
Once overhauled, we need to double check the pushrod clearance. Although it is very unusual to adjust it, I have no idea whether someone touched it in the past or not so always check it.
-
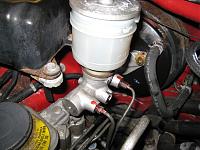
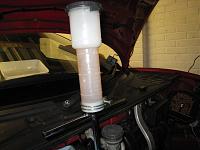
After bench bleeding the master cyl by tilting the cyl at specific angle, it is installed on the car. Pressure bleed the system, left it overnight for the leak check then test driving session followed by another pressure bleed and leak check.
ABS flushing.
While driving this NSX at low speed with window opened, I noticed that the ABS pump was operating almost like every 10sec so I knew the solenoids are leaking or the accumulator bladder is not holding the right pressure.
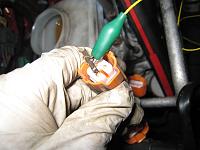
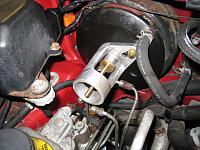
Using ABS SST to release the high pressure fluid from the accumulator.
Flushed the system twice before moving onto the solenoids flush.
All four solenoids were not sticky and operated fine which is a good news.
Flushed the system again twice and waiting for the test driving session.
However, looking at the amount of high pressure fluid returned to the SST, as predicted, looks like we may have accumulator issue. As discussed, considering the usage of this NSX and condition of other ABS parts, it would be more cost effective to invest in the ABS upgrade than trying to replace the parts on this original system.
This will leave us with replacing the Engine Oil & Filter, Main relay and refurbishing Bose speaker AMPs, test driving session and another bleeding with leak check so hope to return this NSX very soon.
Kaz
-
Replacing the Engine Oil & Filter.
This NSX is mainly being used on busy road for short distance so I knew the amount of blowby gas would be significant.
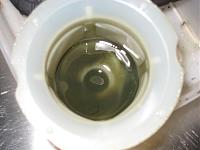
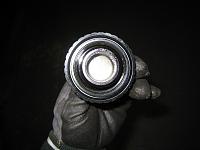
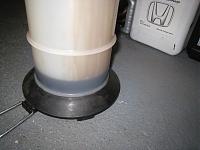
Fortunately or unfortunately, the filler cap was not cleaned thoroughly and you can see the white residue behind the filler cap.
This is the moisture from the blowby gas.
Another reason to replace the engine oil regularly even for short annual mileage NSX.
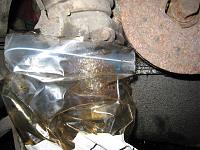
Removing the Eng Oil Filter.
To prevent eng oil from touching the suspension area and stiffener frame, I normally use plastic bag around the filter before removing it. Saves the time cleaning the area.
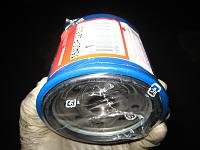
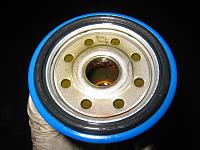
New OEM filter and probably bit too cautious but to keep the same procedure, I always fill it up with the new oil before installing it.
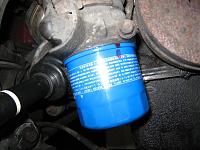
New filter installed. Dont put too much torque as you will struggle to remove it next time.
You dont need big torque once the gasket has seated properly.
-
While waiting for the old engine oil to drain out from the oil pan as much as possible, decided to replace the Main Relay.
Normally, it is easy to remove the horizontal upper interior panel behind the seat as you only need to push down on it and remove the three fixings.
However, on this NSX, it turned into another challenge session due to someone decided to glue down the panel to the firewall. After some investigation, it became clear that the only way to remove the panel is to apply enough force to break the glue even if it may take out the brackets or even damage the panel.
So, phoned the owner, explained the situation and got authorisation for taking the risk.
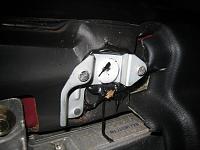

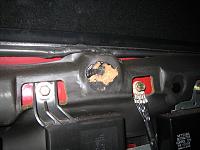
Finally, the panel came off. The strange looking glue at the firewall. It was not even using the correct fixings/clips to glue the panel.
Need to re-plant the brackets back on the panel and use the proper clips for the instalaltion.
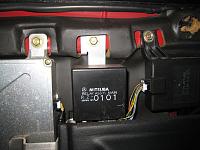
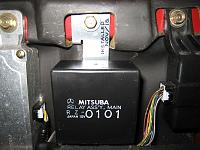
The original main relay.
Although it didnt show any issues, it was from week 33 & 35 of 1990.
New one is from week 18 & 20 of 2010.
-
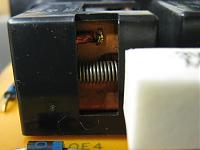
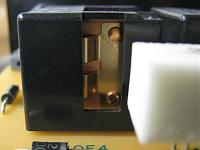
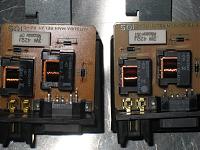
As in my old post, the original relay was using the old design with the spring whereas the new one is using the mechanical plate.
New one installed.
Back to the engine oil.
Managed to extract further 300 400cc from the top.
New eng oil into the engine, fire up for leak check and adjusted the level later.
All four wheels are back on the car now and tyre pressure to be adjusted before carrying out the test driving session. Need to work on the speaker AMPs now.
More to follow.
Kaz
 Posting Permissions
- You may not post new threads
- You may not post replies
- You may not post attachments
- You may not edit your posts
-
Forum Rules


 Platinum Member


 Reply With Quote