-

Hi, Mark.
Looking forward to hearing from you and working on your NSX in the near future.
Regards,
Kaz
-
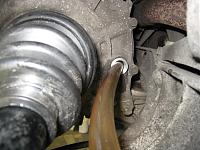
3. Driveshaft and MTF
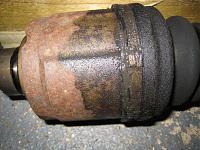
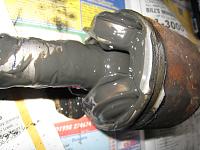
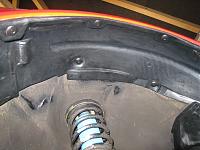
Another typical service that seems to be left until the very last moment is the driveshaft OH. On this NSX, there was no damage to the boot itself but the grease was leaking from the edge of the boot. The leaked grease was splashed everywhere and required long time to clean it.
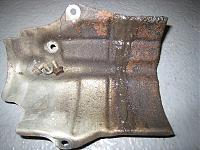
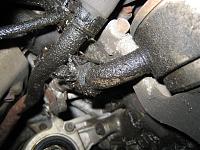
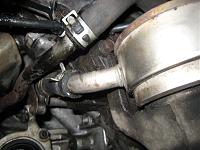
The grease leakage can also damage the nearby short coolant hose at the Engine Oil Cooler Base with the addition of heat from the header/exhaust.
Therefore, it is important to clean this oil cooler area as much as possible.
As the driveshaft joint lost so much grease, the remaining grease turned into black colour although it looks gray in this photo due to the flashlight of the camera.
-
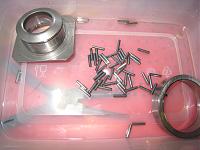
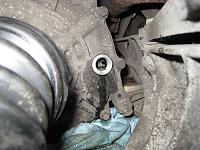
As the state of the remaining grease was so bad, it was decided to service the roller bearing and re-pack the fresh grease. There are 3 rollers on each joints so 12 of them in total...
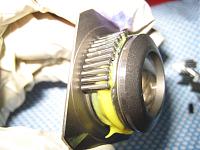
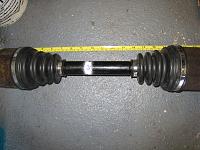
At the final stage of the OH, you'll need to adjust the amount of the air inside the boot by adjusting the entire length of the driveshaft and then tighten the boot band.
Then, re-install both driveshaft back on the hub and stake the spindle nut against the driveshaft.
-
During the driveshaft OH, you'll need to drain the MTF or ATF before removing the Left side driveshaft.
For the MT car, it is good idea to check and clean the strainer before re-filling the fresh MTF. You may struggle to remove the strainer cover if it was ignored for a long time and it can be easily damaged if it was not removed before. The one on this NSX was so corroded that it was decided to be replaced with the new one with the O-ring.
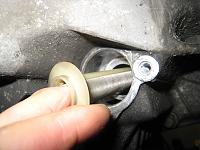
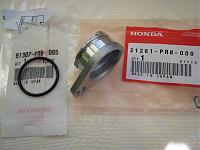
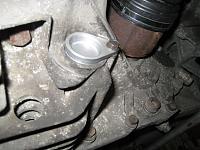
Refill the MTF (Honda MTF-3) and leave it until it stops dripping from the filler hole.
-
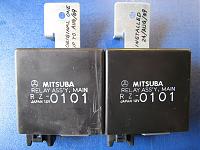
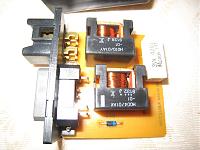
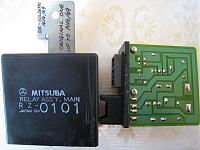
4. Main Relay
The famous Main Relay.
The owner bought it a while ago but didn't have time to install it so I just done it for him.
I always would like to keep the original one and re-solder it to be used as an emergency spare in case someone needs it urgently. I always keep it in my boot. I asked the same for this owner to help other members....
-
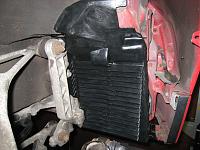
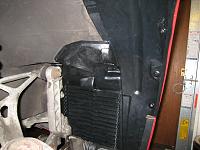
5. Front Wing Inner and Cover
Originally, this NSX had lowered suspension kit with unsuitable alignment and chassis setup.
Because of this, the black plastic part inside the front wing and also the cover behind the A/C condensor fan were damaged.
The old set on the left and the new set on the right.
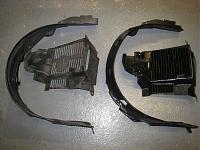
As black is one of the most important factor to sharpen the image of the car, we decided to replace all of them at the front.
Not great photo but it really improved the image of the car.
-
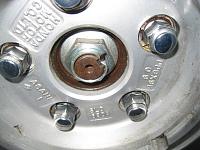
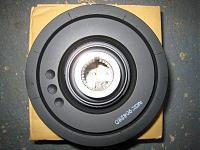
Crank Pulley
I had an opportunity to work on one of the beautiful NSX owned by the well known member here on NSXCB.
It was for the famous Crank Pulley...
The owner spotted the first sign of the issue a while ago and he applied temporary measure before visiting my place.
Previously, the timing belt on this NSX was serviced by the reputable garage so I was hoping to be able to remove the pulley bolt without majour effort. Wrong idea...
The original workshop manual didn't show the cleaning and greasing method for this bolt so quite often, I found it very hard to loosen it.
This one was not greased at all so although the specified torque was 245Nm, I used about 700Nm just to loosen it a little. Had to apply similar force several times before the bolt became loose enough for the removal.
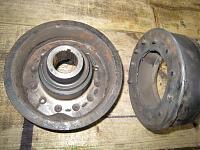
After removing the pulley, it was inspected and without the temporary measure applied by the owner, the balancer came off with ease so I'm glad we carried out the service now.
When it is new, it will look like the photo on the left.
The one removed from this NSX without the temporary measure.
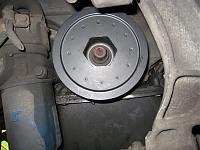
The new one installed.
After replacing the crank pulley, I had an opportunity to drive this NSX.
It has really nice chassis setup including the special suspension kit and many other modifications. It's following the latest trend of the suspension setup that is comfortable for the every day usage but once start driving fast, it allows you to shift the weight with ease. The alignment setup was also spot on.
Very smooth and powerful engine thanks to the mod on the header/exhaust with the combination of aftermarket LSD and felt like it had the modified final ratio.
I heard that this NSX will be in the hand of new owner soon so I hope he/she will keep these nice modifications and looks after it for a long time. You'll be glad to know that the crank pulley has been replaced and the pulley bolt was cleaned/greased properly.
Regards,
Kaz
 Posting Permissions
- You may not post new threads
- You may not post replies
- You may not post attachments
- You may not edit your posts
-
Forum Rules


 Platinum Member


 Reply With Quote