Hi, all.
Addition to my NSX Climate Control Unit (CCU) service, I have been offering the NSX Health Check Service for some of the members here.
As I received similar questions on this, I would like to share some of the information of the service and the maintenance works carried out based on the result of this.
[Edit: It will take minimum of 4Hrs plus another 1Hr for the report.
Due to the time required and to be fair with the owners who are taking the further service based on the health check report, the new price is GBP250 as of May/2012 and it includes GBP100 deposit towards the future major services.
The depoist is valid for a limited time decided by myself and as it is recommended to take Health Check service once a year, the time limit will be much shorter than that.
The criteria of 'major service' to be decided by myself.
The depoist of GBP100 won't be refunded to the owner if one couldn't take the major service within the time limit unless separate agreement has been made with me.]
As I can only carry out this during my spare time at this stage, it will be private/friend basis.
I will inspect your NSX for about 150 check points from top to bottom and front to rear. During the health check, Ill ask several questions such as when the last time this part was serviced so it would be nice if you can bring your service record or study them prior to the health check.
After this, Ill summarise the recommended future service works with three different priorities so that you can discuss with your mechanic or myself to schedule the service timing and also spread the cost. It is recommended to carry out this kind of Health check every 6 months regardless of the mileage since the last health check.
As a personal opinion, anyone with NSX workshop manual can carry out the service work. Also, anyone with the parts list can place the order for you.
However, the service result would be different depending on the knowledge, skill, experience and so on. On top of these, there are several things that can only be detected by the sense/feeling which is not on the workshop manual.
You could be ordering a part without knowing the fact that it could be repaired rather than replacing or it could be upgraded with small extra cost.
Addition to these, knowing the car from the development stage, understanding the specific design reason of each parts and experience in the motor racing will make different level of service.
Some of the members decided to go ahead with the Health check service and even went further to leave the car at my place or placed orders for the parts.
Followings are some of the works that I carried out recently.
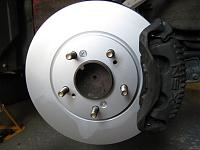
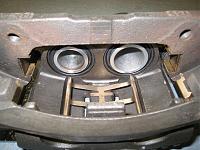
New Front Brake Disks and Refurbished Front Brake Calliper with new pistons
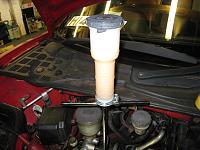
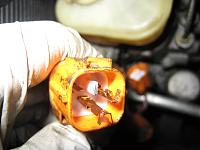
ABS service including flushing the four solenoids


Originally Posted by bobbyswanbourne


 Reply With Quote

