-
20-10-2010, 10:06 AM
#471


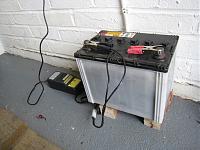
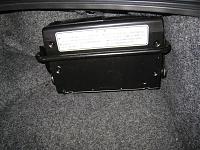
Disinfected the evapo as much as possible and put the battery case, spare tyre holder and so on back on the NSX.
By the way, during the TB service or duration of the entire services, the battery was kept on the conditioner to keep it healthy.
About 1 year ago when the owner brought this NSX for the Health Check, I mentioned to the owner that this battery was from Japan and it was manufactured in Feb/01. Now, its more than 9.5 years old so it would be best to replace it soon.
This battery is of old spec and the internal cell/plate could physically collapse when it gets too old and with vibration.
You cant re-charge it once it happens and for some reason, it always seems to happen at the most inconvenient timing.
The price of Honda battery dropped dramatically over the years and even the AT model requires the larger capacity one, it is the same price as MT model and only at about GBP54+VAT from your local Honda dealer.
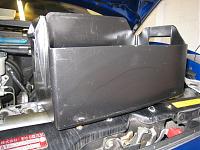
Although you cant see it from outside, I prefer cleaning the parts before putting it back in place so cleaned the battery case.
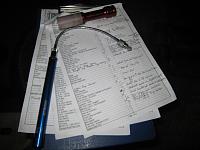
Carried out the four hours Health Check session. My own check sheet with more than 150 points to look at.
There were some new items to be addressed soon as well as some of the low priority ones from last year.
For example, as mentioned last year, looking at the text on the fuel filter, it looked to be the original one. Although JDM doesnt have time/age related service interval for the fuel filter, considering the usage and mileage of this NSX, it would be best to replace it at some point in the near future.
-
20-10-2010, 10:35 AM
#472

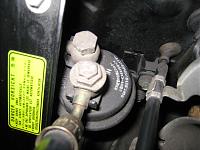
Addition to the evaporator, the A/C gas/oil was leaking from the Front Right condensor area. There is an O-ring inside there and the O-ring material has been treated for different A/C gas type. Replacing the O-ring at this specific connection point is quite challenging and quite often, you will need to replace the entire condensor and the pipe as the fitting would no longer make good sealing due to the corrosion.
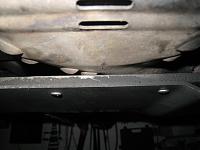
The Front bank CAT was very close or touching the rear diffuser bracket. Depending on the temperature, it could cause some noise.
Both door power window were very slow on going up. There are lots of nice write up on this on the NSX Prime and even a customised parts available from one of the member.
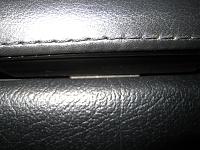
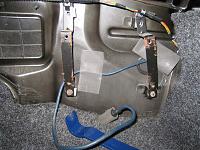
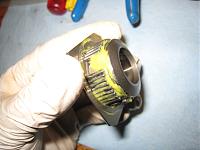
One thing to be noted. Whenever you adjust the window alignment or replacing the upper door weatherstrip and/or the Front Sash, you must double check the version of Front Sash and Weatherstrip.
Honda revised the design of weatherstrip and the part no. was changed accordingly. It changed how the window glass sits/seals against the weatherstrip. The part no. for the original design was superseeded and you can only get the latest design these days.
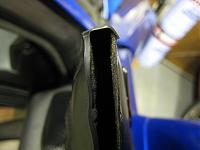
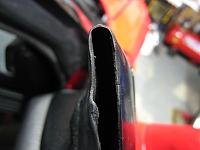
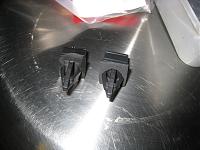
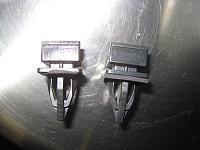
The design of Front Sash was also changed as you can see in the photos above. Left one is the original and it has thicker and stiffer section than the revised one on the right. However, the part no. didn't change and it looks like the parts manufacture changed it without telling Honda.
Because of this, if you work on the door window to improve the speed and adjusted the alignement or replaced some of the above parts, you may get water leakage or wind noise if you don't know the parts combination and how the door glass should sit on the weatherstrip.
This is not even on the parts system or workshop manual and one of the special know-how.
-
20-10-2010, 11:45 AM
#473
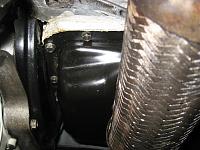
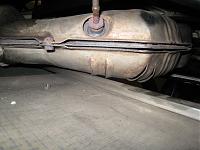
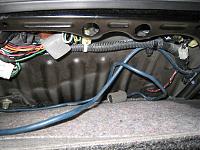
As mentioned in the earlier post, the Oil pan and pan gasket must be replaced by removing the front bank exhaust/manifold down pipe.
Even after a short test driving session after TB service, I already noticed tiny leakage from the area where someone placed some sealant.
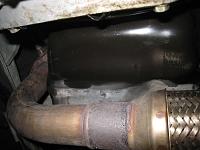
Long-long time ago, when I removed the down pipe for the same purpose, I managed to trigger the ECL for the front bank O2 sensor. You dont need to remove the Front O2 sensor for the down pipe but it sits right next to the connection point where you need to remove very rusty three nuts to drop the down pipe.
I was very careful not to apply even a tiny bit of penetrating oil at the base of O2 sensor but still, managed to contaminate it. If it was my NSX, I would probably just drive the car for a while to burn it off but at that time, I had to replace the sensor for the owner.
Since then, may be Im bit too cautious but prefer not to touch the down pipe without having the access to the spare O2 sensor. Luckily, for earlier models, spare O2 sensor is quite cheap so kind to our pocket.
Ill need a few days to complete the Health Check report and then it will be forwarded to the owner.
Where is the iPod adaptor?? Its still sitting at the UK Custom
.. It is taking really long time for them to calculate the duty/tax. It was shipped out as Express service but already 3 days gone past
Is everyone already buying Christmas presents from abroad??
While waiting for the delivery, I decided to start modifying the centre arm rest using the existing holes.
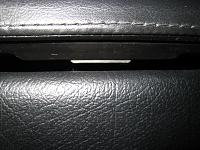
During the process, I noticed that the arm rest lid didnt close smoothly. I found that one of the spring at the hinge got dislocated and obstructing the mechanism. Disassembled the lid module and repaired the hinge. Now, it closes properly.
-
20-10-2010, 11:48 AM
#474
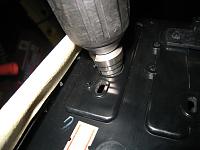
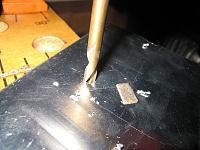
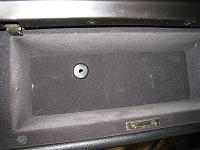
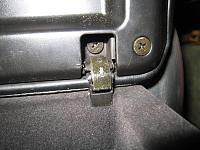
Drilling the hole at the base of the arm rest box to allow the iPod adaptor cable to pass through. Same thing on the thin aluminium plate at the bottom of the box.
Using the rubber grommet to prevent anything dropping through the gap once the cable is installed.
Now I really need the package to be delivered very soon as all other owners are queuing for the services
I havent even managed to contact any of the owners waiting for the Health Check for several months
More to follow...
-
22-10-2010, 08:09 PM
#475
After sending email to Parcel Force, finally, the iPod adaptor USA Spec PA11-HON was released from the UK Customs and on its way to delivery depot.
I havent received the letter for paying the duty/tax/handling charge yet so it will take extra few days before delivery but just need to wait.
I may pick up the package by myself to speed up the process before the delivery.
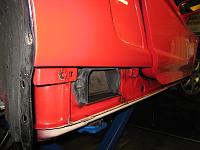
Once this iPod adaptor is installed, there will be no power to the CD changer. Therefore, spoke with the owner and we decided to take out the CD changer. Its quite easy if you have the installation manual for it.

The original unit. In the process of removing the bracket.

Removing the extension cable. CD changer and all the extra parts including the extension cable removed from the panel ready to be handed over to the owner.
-
22-10-2010, 08:12 PM
#476
For the preparation of next NSX service, started to re-furbish the Right side drive shaft using my precious spares. This will at least save some time to cope with the long delay.....
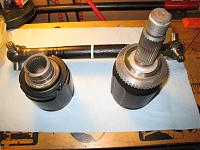
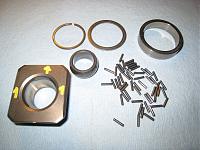
Painted the joints and shaft as usual.
Cleaned and inspected each rollers. There are 6 joints in total for each drive shaft.
Planting the 10s of roller bearings with the new grease.
-
22-10-2010, 08:18 PM
#477
On my NSX, I noticed that the side sill panel rattles a little when pressed down.
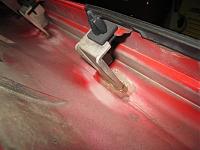
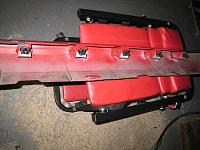
Long time ago, I found several damaged brackets inside this panel which resulted in rattling noise so I used special plastic repair material to repair them.
However, due to the specific plastic material being used, it seemed that it didn't bond together well.
This time, I decided to use the anti-vibration glue to secure the brackets and replaced some of the side clips.
Will need to leave the side sill overnight for the glue to cure and then I can start putting back all the parts in their original place.
More to follow...
-
25-10-2010, 10:21 AM
#478
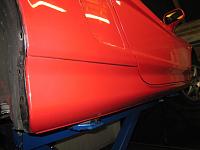
Once the glue settled, the side sill was placed back on my NSX.
No more rattling and Im happy now.
-
25-10-2010, 10:24 AM
#479
Once the CD changer was removed, please remember to insert the three screws to protect the internal mechanism during transportation.
There is a small bag attached to the changer cable and if the instruction was followed properly during the installation process, you should find these screws inside this bag.
If someone wants to use this CD changer again, then he/she will need to remove these screws during the installation.
One of the screw is under the white label and once the screws are removed, the hole should be covered by small tape to avoid dust getting inside. Initially, there was small black tape included in the installation kit.
-
25-10-2010, 10:32 AM
#480
I couldnt wait any longer for the delivery of iPod adaptor and although I havent received the letter for the Duty/VAT payment, Parcel Force was kind enough to check the total price and let me collect the package from their local depot.
For your reference, the iPod adaptor was about GBP100 including the delivery charge from US and GBP30.00 for the VAT including the handling charge for Parcel Force.
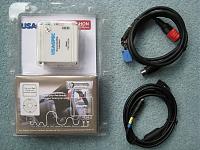
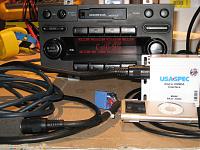
The USA Spec iPod adaptor PA11-HON.
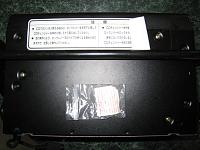
Before starting the installation, I checked the adaptor on my NSX and it worked fine. Then, tried the same on this NSX and the head unit didnt recognise the adaptor as the CD changer.
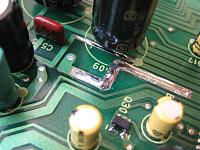
I had similar issue in the past so decided to open the head unit and found this.
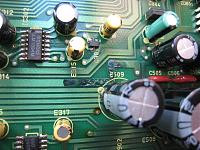
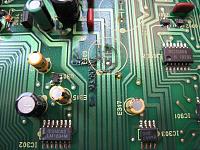
Some of the capacitors were leaking the acid and damaging the circuit board. I think this is also the cause of the loud breaking/sand-paper-like noise at the right side door speaker even after the Bose AMP was replaced.
This head unit is JDM so the circuit board design is different from the European model including the UK spec. However, the symptom was exactly the same as the one that I recently serviced as in the post #467.
I was lucky enough to keep just 1 set of capacitors required for the head unit service as I normally dont keep any stock for this.
Cleaned and repaired the dissolved circuit track.
Bench testing the head unit with Ext cable to simulate the length of the cable to the iPod adaptor.
iPod Mini correctly recognised and playing the 95th MP3 file. You can control the iPod through the control buttons on the head unit just like operating the CD changer so you can skip, fast forward/rewind, shuffle, etc. If you use the specific name on the Play List, you can also deal with several play lists by selecting the Disc number
 Posting Permissions
- You may not post new threads
- You may not post replies
- You may not post attachments
- You may not edit your posts
-
Forum Rules


 Reply With Quote