
As always , excellent write up and photos Kaz, now that I am back in Bedfordshire, I'd like to see you about a health check/service for my car as it is LONG overdue.
Jim


 Platinum Member

As always , excellent write up and photos Kaz, now that I am back in Bedfordshire, I'd like to see you about a health check/service for my car as it is LONG overdue.
Jim
1992 NSX, 3.0 Manual, (Was Sebring Silver) Now Kaiser Silver
2018 Jaguar XE, 2.0 R-Sport 250, Loire Blue.
2013 Kawazaki ER6F, Metalic Green.
Where are you based in Bucks? I'm also in Bucks.Originally Posted by AR

There is quite a lot of work to be carried out on my car including air con, new front knuckles (worn ball joints!), replacement ABS modulator etc . . . not to mention window fix kit and other smaller items.
I had been planning for most of this work to be carried out at a local garage . . . well at least the larger work. However things like the Antennae still do not work properly so I would be very interested in your "check up".
 Platinum Member
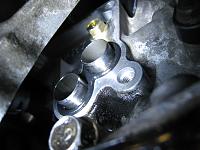
Before starting the Valve clearance adjustment, just check the TB installation for the timing and tension again and again and again.
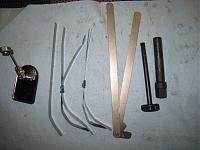
The combination of tools for the valve clearance adjustment.
Front Bank adjusted.
Platinum Member
Rear Bank in the process.
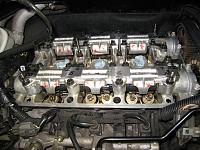
Front bank checked for the clearance and torque twice.
Rear bank also checked twice.
Time to put everything back in place.
More to follow.

Excellent write-up and pic as usual Kaz
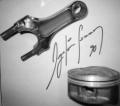
May I ask the reason why you removed the cams? Was there something going on/wrong that required it or was it purely for inspection purposes?
Cheers
Mark
The older I get, the faster I was
Platinum Member
Hi, Mark.
Nothing wrong with the engine and it's just the standard procedure included in my TB service.
The main purpose is to replace the camshaft oil seal (brown) and the cap (black) during the TB service as in post #448.
You may be able to replace the cap without completely removing the camshaft but you will need to replace the small O-ring under cam holder #1 and to replace the cam oil seal, you need to remove all four cam pulleys any way so best to take the camshafts out of the engine.
Also, I prefer cleaning the cam holders and covers and check the camshafts.
The oil jet is such a small diameter and I dont want to leave them until the next TB service without being cleaned and compressed air passed through each of them. I dont like blowby gas residue and we are relying on these tiny oil jet for the camshaft lubrication.
Kaz
Platinum Member
TB Front cover and the Rear one installed.
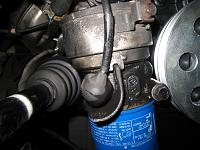
New Figure of 8 O-ring for the oil cooler base and the assy installed.
Crank Pulley for AT model so the diameter is different as well as the appearance. The pulley bolt has been lubricated, cleaned, degreased for the specific area and torqued to the spec.
Platinum Member
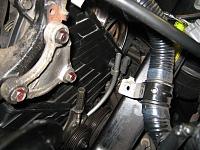
The side AT mount bolt torqued to the spec.
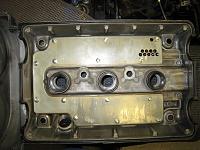
The head/valve cover was cleaned and prepared with the new gasket kit a few days ago so the liquid gasket has already cured.
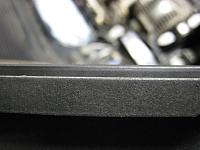
Before the installation, the gasket thickness looks like this.
Then, after the installation, it will be squeezed down to this thin level so it is very important to always use the new and complete gasket kit once you open the head cover. Otherwise, it will cause oil leak.
Platinum Member
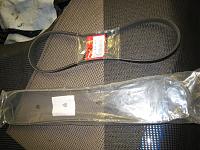
New ACG and A/C belt. For AT, you need AT spec ACG belt.
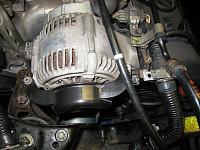
ACG and Front head cover installed followed by the rear one.
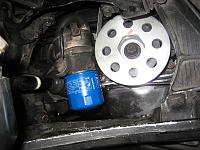
Almost done for re-assembling the parts and ready for re-filling the coolant system and for another compression check.
Owner wanted to add extra service while the car was at my place.
He wanted to install the USA Spec PA11-Hon iPod adaptor.
I have been using the same supplier in US for many years and normally, I can get it in about a week after placing the order.
However, for this time, it was taking long time not even shipped out from US after about two weeks.
It was the problem at the manufacture sending re-conditioned or used products to my supplier and Im glad they spotted it before sending it to UK.
In fact, the supplier had to return the products twice to USA Spec as they were not happy with the package. Another reason why I like keep using this supplier because of the attention to the detail.
It completely changed my future service and Health Check plan for other owners but I hope I can get it very soon .
More to follow.
Platinum Member
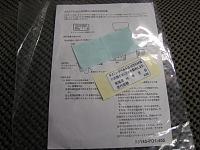
The sticker included in the JDM Timing Belt kit. It will show the history for the TB service.
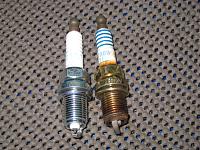
As mentioned previously, I didnt like the corrosion at the original spark plugs even well below the 60K miles service interval. Therefore, all six plugs were replaced with the new ones.
One of the most important parts to be replaced. The IGN Coil cover seal. New one installed and applied silicone grease. Best to check it once a year.
 Posting Permissions

 Reply With Quote