Today at Atelier Kaz - ex-Honda R&D, F1, Indy/CART engineer
Brake OH 02
by , 27-07-2012 at 10:28 PM (2523 Views)
Started the day with cleaning of parking brake mechanism at
the rear calipers.
Spent hours until I felt no friction at all at the pin bearing.
Ill carry out one more cleaning session tomorrow before
start rebuilding the rear calipers.
Cleaned the cyl wall to this level at the front caliper.
Quite often, I receive the email on how to install the two pistons and
the dust boots at the front.
There are several methods and I prefer using the brake piston tool to
hold one piston against the boot and then use the compressed air while
holding the other piston to pop the boot over it.
If the seal and boot were installed properly, the piston should slide smoothly
into the caliper with tiny force by just the finger.
If you were having difficulty, then either your boot or seal were not installed
properly or you have problem with your piston but very unlikely unless
you have dropped it.
Just double check the installation by pushing out both pistons with
the compressed air and then push them back in again.
New bleeder plug used.
Normally, you can re-use the banjo bolt but this time,
I didnt feel comfortable using this heavily corroded one so
decided to replace it.
As reported earlier, the wear indicator at the inner pad of both R & L caliper was
installed upside down previously and in order to keep the same contact face,
I had to re-install them in the wrong orientation again.
It should be placed at the top for the design/position of this caliper.
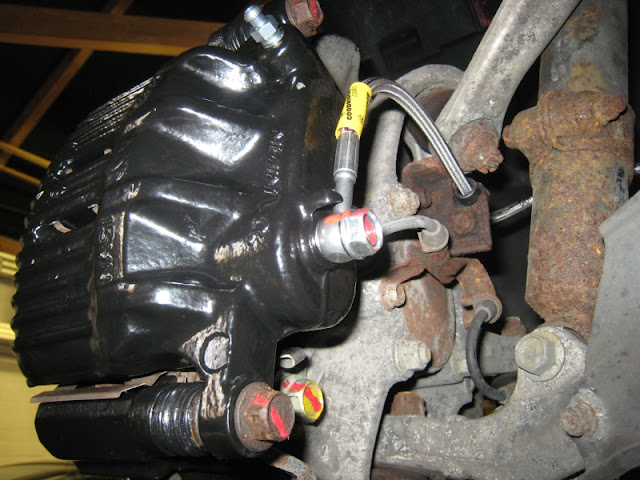
Custom made Goodridge brake lines installed.
Carefully install it without twisting it.
Digital photo with flash is not easy to show the real colour but
it looked really nice with the polymer coating.
Will work on the rear from tomorrow.
Kaz


Tags:
brake caliper,
caliper,
caliper oh,
caliper overhaul

- Categories
- Brake
 Email Blog Entry