


Today at Atelier Kaz - ex-Honda R&D, F1, Indy/CART engineer
Final Touch
by , 10-11-2014 at 10:30 PM (3218 Views)
Managed to drill out one of the bolt holding the brake line bracket at the original position.
Looking at the surface of the other bolt, I didn't have enough confidence in driving the drill square through the remaining bolt body so decided to leave it as it is. Not a problem as at the other side of the hub carrier, I re-installed the rubber protector around the brake line so it won't scratch against anything.
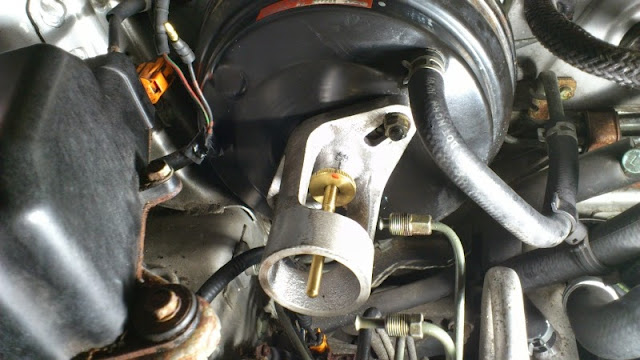
Removed the original brake master cyl and I think it was slowly leaking.
There was tiny amount of brake fluid at the mating surface on the brake booster and although there was a small seepage hole at the base of the master cyl, it was blocked by so many debris that the brake fluid couldn't go anywhere.
Cleaned the area as much as possible in order to create good tight seal for the booster.
Using the SST, checked the pushrod clearance as I have no idea on what was done on the brake system in the past.
After bench bleeding the new master cyl thoroughly, installed it on the car and time for the 1st round of the pressure bleeding.
After the 1st round, kept the brake system under pressure for leak test before carrying out the 2nd round.

While waiting, started installing the 3rd brake light cable through the boot lid and attached the WPC connector to the LED light.
One of the connector was using the non-WPC spec so as a precaution, filled it with silicone compound to prevent corrosion. Boot section can easily get condensation so not sure why Honda didn't use WPC.
The proper cable bracket at the left side gas damper. Even with this bracket, after some time, this cable can get damaged just at the plastic tab sticking out at 90deg against the damper body.
Carried out the 2nd round of pressure bleeding and now happy with the pedal feeling.
Adjusted the parking brake, tightened and locked the spindle nut at the right drive shaft.
Tested the 3rd brake light and happy with it.
Reset the ECU and time for the test driving session.
As the replacement RL wheel speed sensor is not delivered yet, the ABS and TCS warning lights were still triggered and thus, no ABS/TCS at the moment so please be careful. TCS on non-DBW model is so primitive that no concern at all but driving without ABS on public road is not fun.
Until the rear brake disc and pad get worn properly, can't adjust the parking brake too close to the limit so please re-adjust it after several 100s miles.
Now that the brake piston moves freely and pushed back a little by the effect of new seals at all four corners every time when you release the brake pedal, you may feel knock-off like feeling (extra pedal stroke before start feeling the build up of pressure) for a while but it's so much easier to control the brake pressure now. Before the service, the car just didn't slow down efficiently and because the pistons and calipers were heavily seized, it was like On/Off brake feeling.
With full OH, now you can control the brake progressively along the pedal travel so it's so much better now.
Cool down session, final check around the car and happy with the result so washed the car.
Thank you for using my service and hope you will enjoy driving the NSX again.
Regards,
Kaz


- Categories
- Driveshaft , Brake , Electronics
 Email Blog Entry


