


Today at Atelier Kaz - ex-Honda R&D, F1, Indy/CART engineer
Defrost panel, Bilstein damper, iPod adaptor 07
by , 25-06-2014 at 12:28 PM (2743 Views)
Started the installation of Bilstein damper but I accidentally deleted all of the photos except one that I took on Monday.
Fortunately, it's just the repeat of same procedures so not perfect but took similar photos again.
Originally, we were talking about installing the BC Coilover kit with Swift spring upgrade.
However, after discussing the rideheight requirement with the owner, it became clear that it has to be very close to the OEM rideheight.
Long time ago, I checked with BC Racing regarding the optional bottom holder at the front in order to raise the front rideheight but it was not available.
I could sandwich metal disc at the top hat and already designed it but considering the remaining thread length and locking nut used, I could only insert 10mm plate and with the lever ratio, that will only raise the front rideheight about 15mm which is still no where near to the OEM height.
At the end, we came to a conclusion that it is not the best solution to install the BC coilover so decided to use Bilstein damper with OEM spring instead.
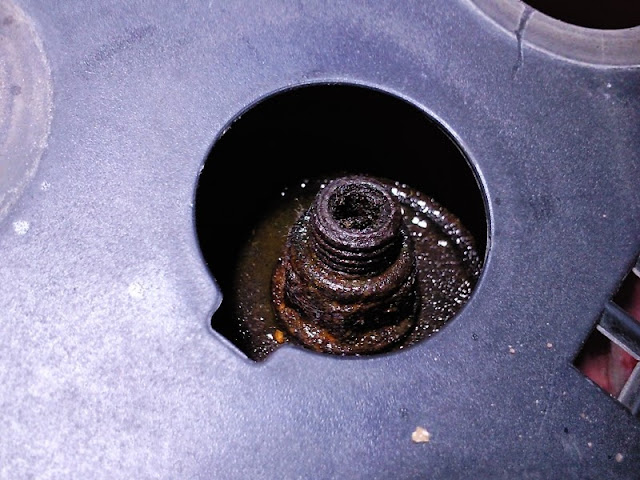
While the hex holder hole is protected at the rear, the one on the front OEM damper is not.
I'm going to have lots of fun disassembling the OEM one....
The Bilstein kit.
The format of the parts no. changed but still the same product.
Still not sure why they can't provide the blue dust cover with proper fitting at the rear.
The diameter is too large and cause open end and when trying to use the cable tie, it makes the dust cover squashed and looks ugly.
As there were bit extra oil than normal on one of the damper body upper section, compressed all four dampers and confirmed their operations.
All of them were fine.
While you can re-use the OEM parts, I don't like doing so especially if the original ones covered lots and lots of mileage/years.
So, always use new damper mounting rubber, top hat bushes and shaft.
Normally, I mark the spring and the hat to install them in the same position but for the Bilstein, in case the owner decides to use the lower perch with wider tyre or aggressive setting, I'll install it in a way to maximise the gap between the bottom of the spring and the tyre.

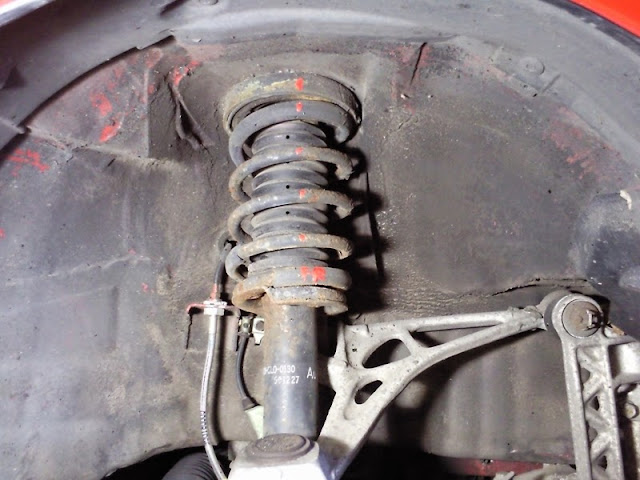
The OEM damper and spring.
To test the original one, compressed the damper but it took ages to get back to its free load state so it's dead. You can check the production date by the numbers on the damper body and all four dampers were the original ones when this NSX left the factory.
Considering the age and the mileage, no surprise that the dampers were already dead.
All of the bump stop rubbers/foams had lots of cracks and partially broken inside the dust cover.
When I opened it, lots of pieces just fell out.

Completely compressed top bushes and very rusty metal shaft. Another reason why I prefer using the new parts.
The old and new bush.

The top hat mounting rubber was also deformed heavily. Could be re-used but don't like it and replaced with new one.
The old and new mounting rubber.


- Categories
- Suspension
 Email Blog Entry


